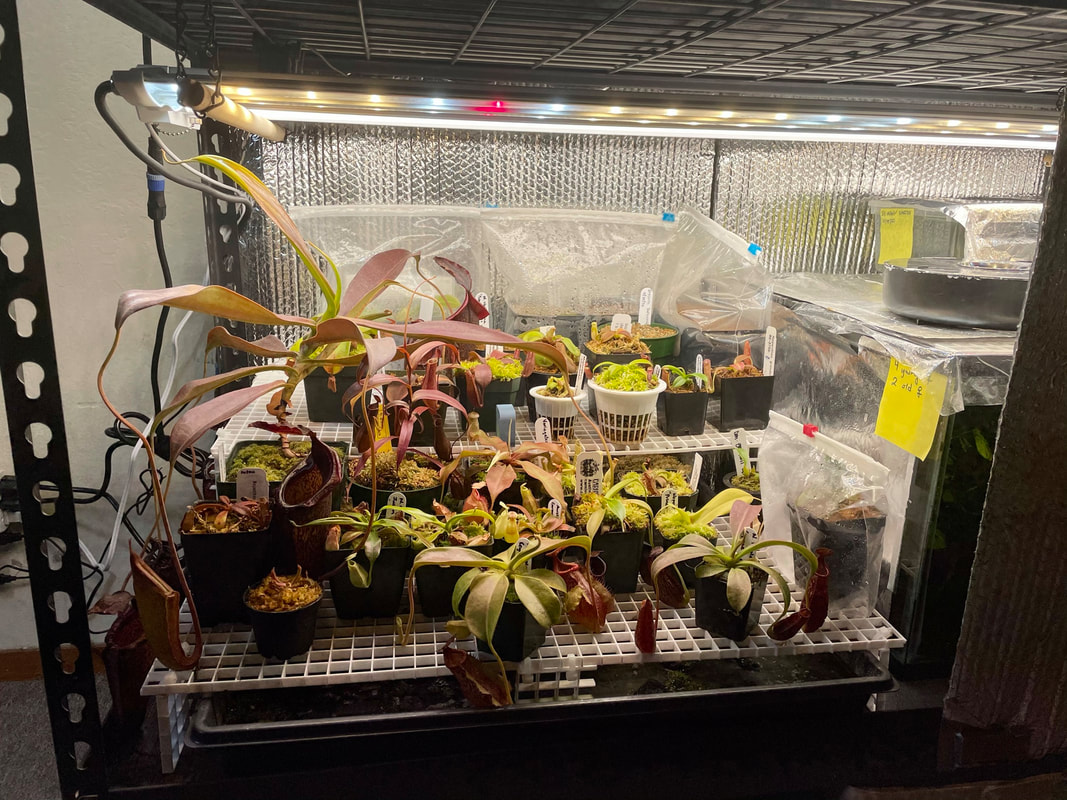
 Terrarium before breaking it down to add the seedling heat mat underneath the humidity trays Decided to boost the heat in my greenhouse shelf terrarium by adding a seedling heat mat underneath the humidity trays. The cooler December weather has really slowed down my lowland Nepenthes! A few of my plants were also unhappy about the higher light intensity after adding the Carnivero Florawave light, so I wanted to remove the LED shoplight and make it the Florwave the sole light source, which would make the terrarium even colder. 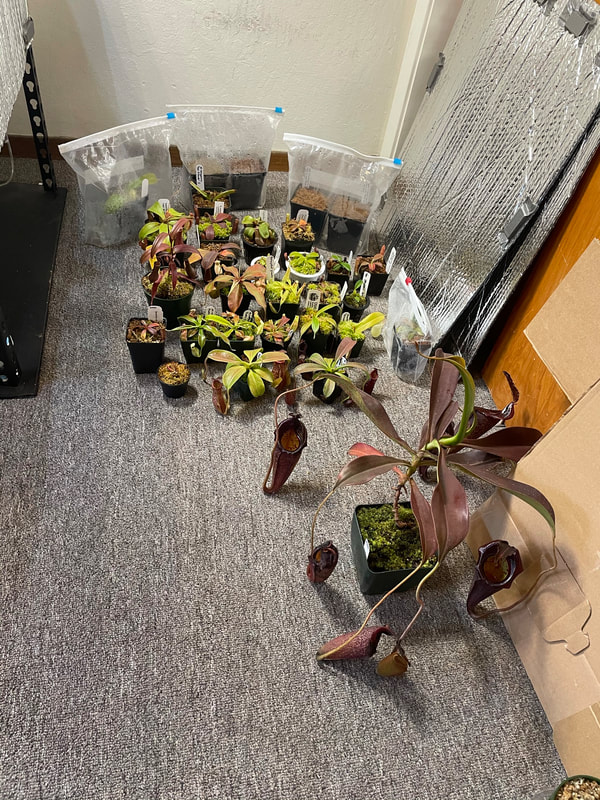 Omg so many plants hahaha. Need to be SUPER careful and not break any baby pitchers!! 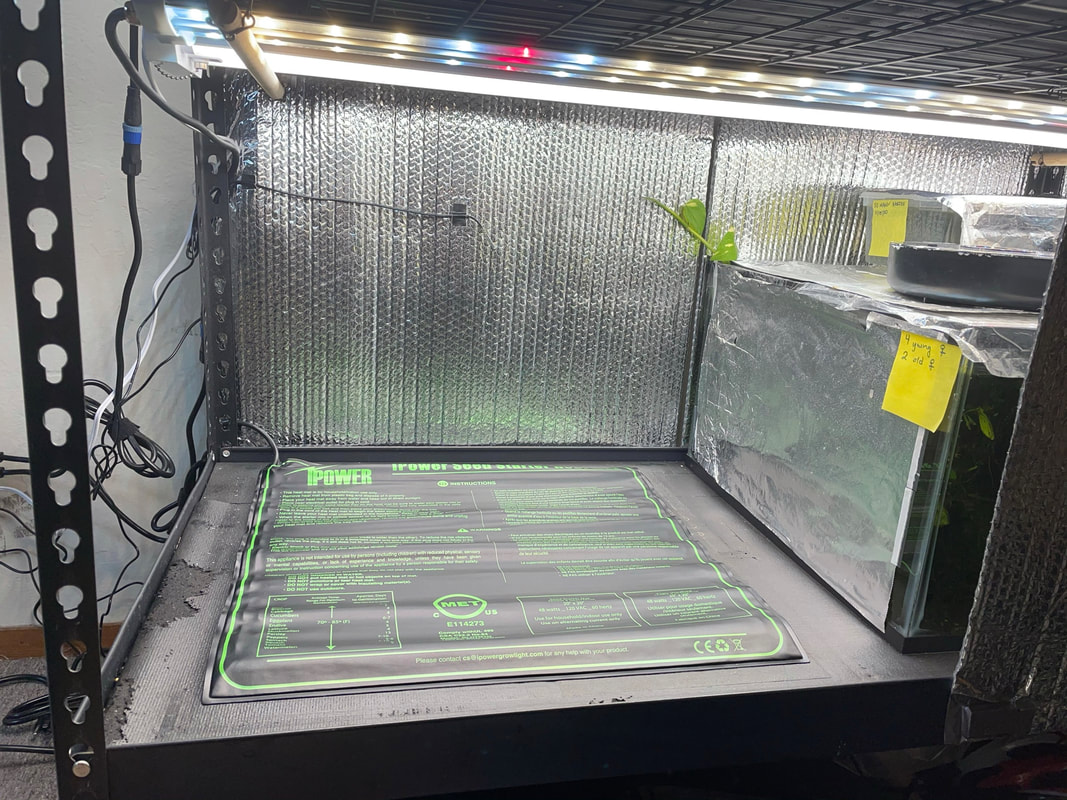 Fits perfectly in the space! I am using an iPower 20" x 20: seedling heat mat connected to an iPower thermostat set to 85F. I taped the thermostat probe to the center of the back wall. 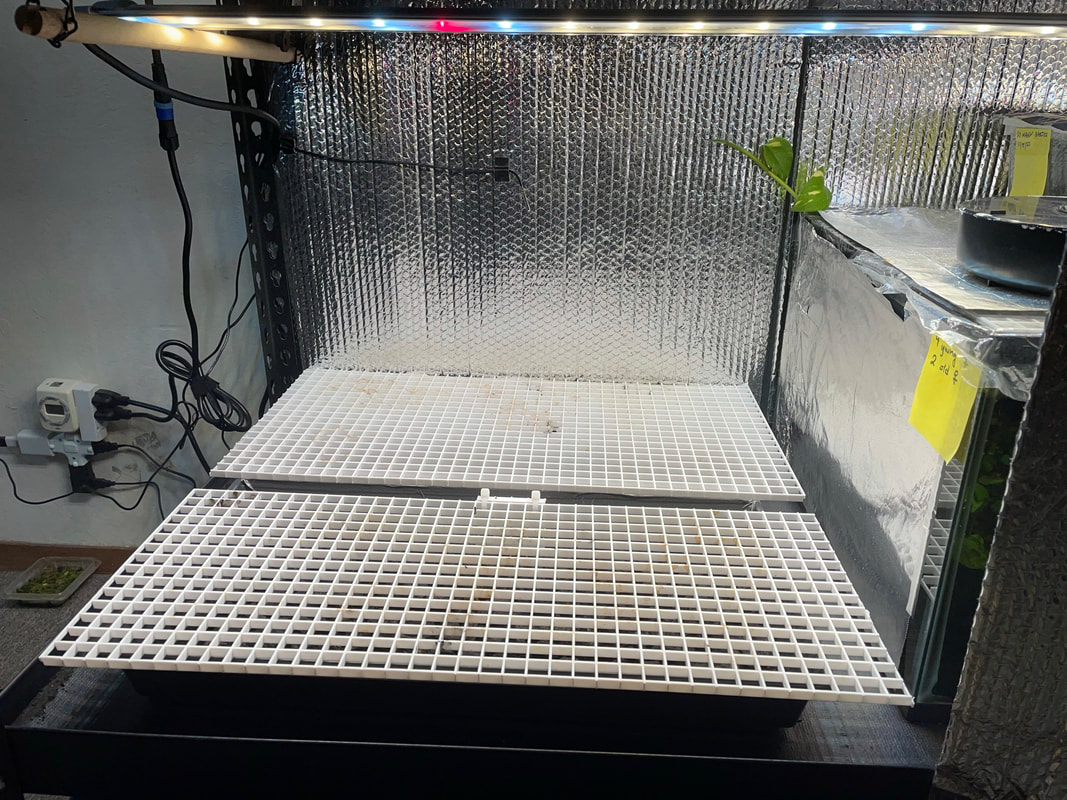 Humidity trays overlaid with egg crate light diffuser I duct-taped two 10" x 20" seedling trays together so that no water would escape down the middle, then filled them with about an inch deep of black lava rock to increase the surface area for the warmed water to evaporate from. Hopefully this boosts the relative humidity in the terrarium! I then overlaid the trays with egg crate light diffuser to provide a level surface for my plants. I decided to do away with the multiple shelves and just have a single level to maximize space in the terrarium (a constant problem!) 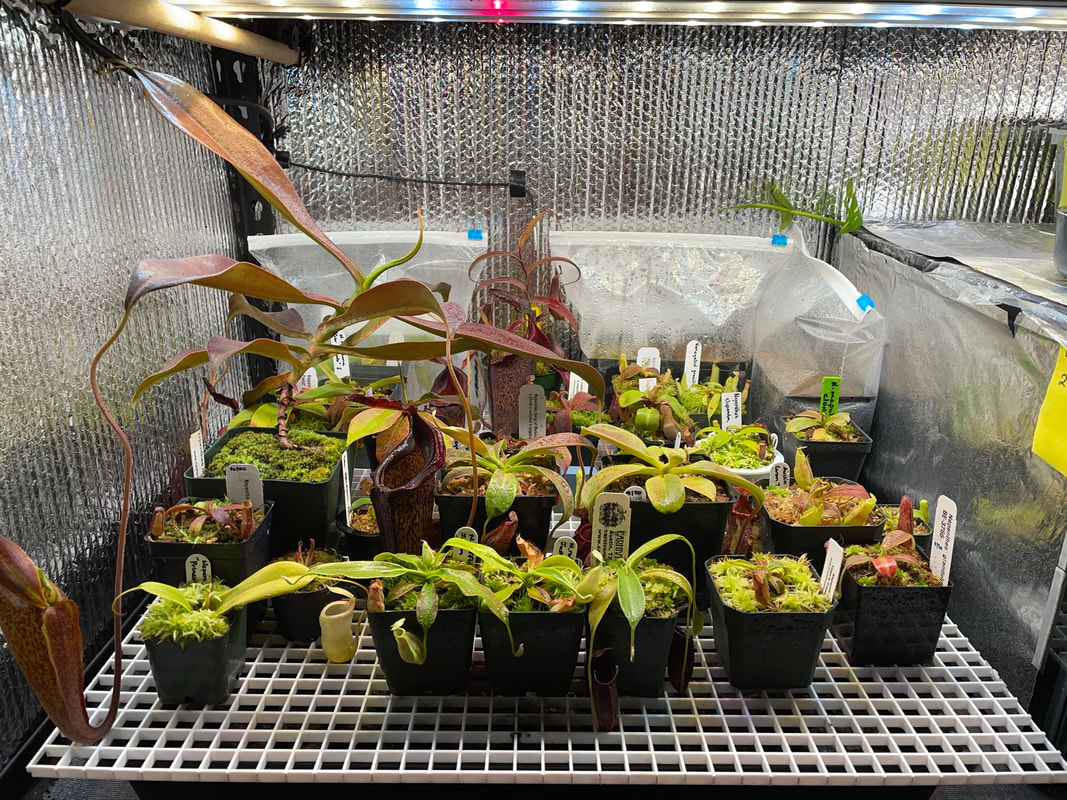 Re-potted a few Nepenthes and rearranged the layout! Hope they enjoy the changes! 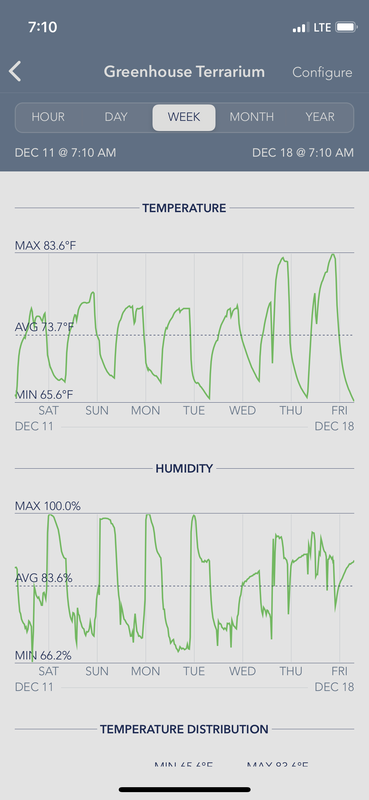 Perfect temps after adding the heat mat! Perfect temps after adding the heat mat! Temperature and humidity measured by my SensorPush look spot on! Loving the increase in daytime temperature. I plugged the heat mat into my timer so that it only turns on during the daytime, that way we still get modest night time drops. The humidity is interesting - seems to be more stable, although I am curious why night time humidity does not stay close to 100% like it did prior to adding the heat mat.
It's been about two weeks since adding the heat mat and removing the LED shoplight. The plants are LOVING it! My lowlanders have definitely appreciated the boost in warmth and are rewarding me with noticeably faster growth. The heat mat seems to turn on for about 4-5 hours before shutting off.
4 Comments
I thought it would be interesting to share how I built my "greenhouse shelf terrarium". I already had this metal 4 foot x 2 foot heavy duty set of shelves (unfortunately my particular model is discontinued) for my various fish tanks. Over time my fish population decreased while my plants exploded in number and size! I needed more growing space and utilizing the lower shelf was the ideal way to do so. 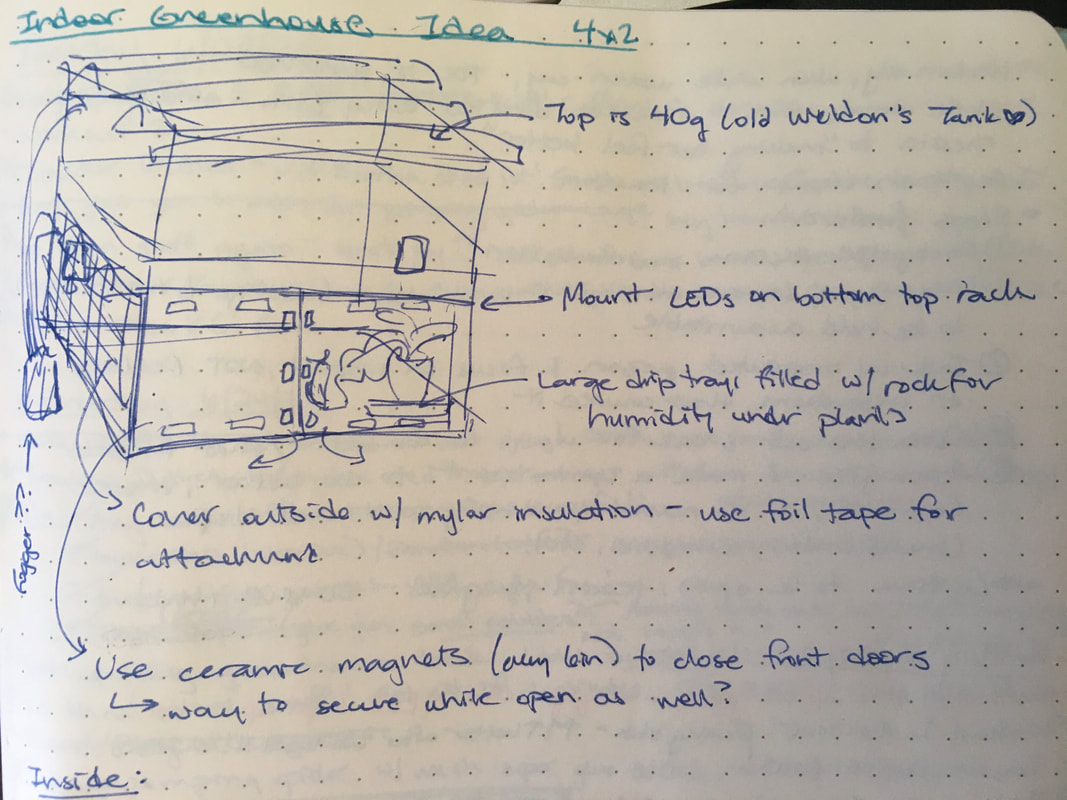 Every good build starts with some preliminary research and a brainstorming session :) I knew I wanted to enclose the lower shelf with reflective insulation to bounce back the light and contain the heat. I also wanted everything to be adjustable. Here are the details on each part of the build: Light Luckily my shelves are 4 feet long, which is the length of most shop lights. I got some 4000K LED shop lights SUPER CHEAP from Costco (buy one get one free sale!) and my plants grew well under them, but I recently upgraded to Carnivero's Florawave SV40 lights (test unit discount!). Now I have one 4000K LED shop light and one Florawave SV40 light over each growing space and I am extremely happy with the results! (See the difference in my review video below). PPFD averages 170 but I can use the multiple levels to adjust individual lighting needs. The light fixtures are resting on simple hangers I made from extra wooden dowels and leftover pieces of chain from other projects. The chain is looped on the upper shelf's wire rack and I can raise and lower the lights by adjusting the length of the chain and easily reposition the lights by sliding them around on the dowels. Reflective Siding The shiny material enclosing the shelf is Reflectix insulation, which is basically Mylar-covered bubble wrap. It is lightweight, flexible, and durable. I used duct tape to secure ceramic magnets to the edges and just slap it on the metal frame of the shelf. I love how I can super easily reposition them when looking at my plants! I can take them on and off in seconds or even partially open the flaps to peer in at my plants without losing too much heat or humidity, as seen below. 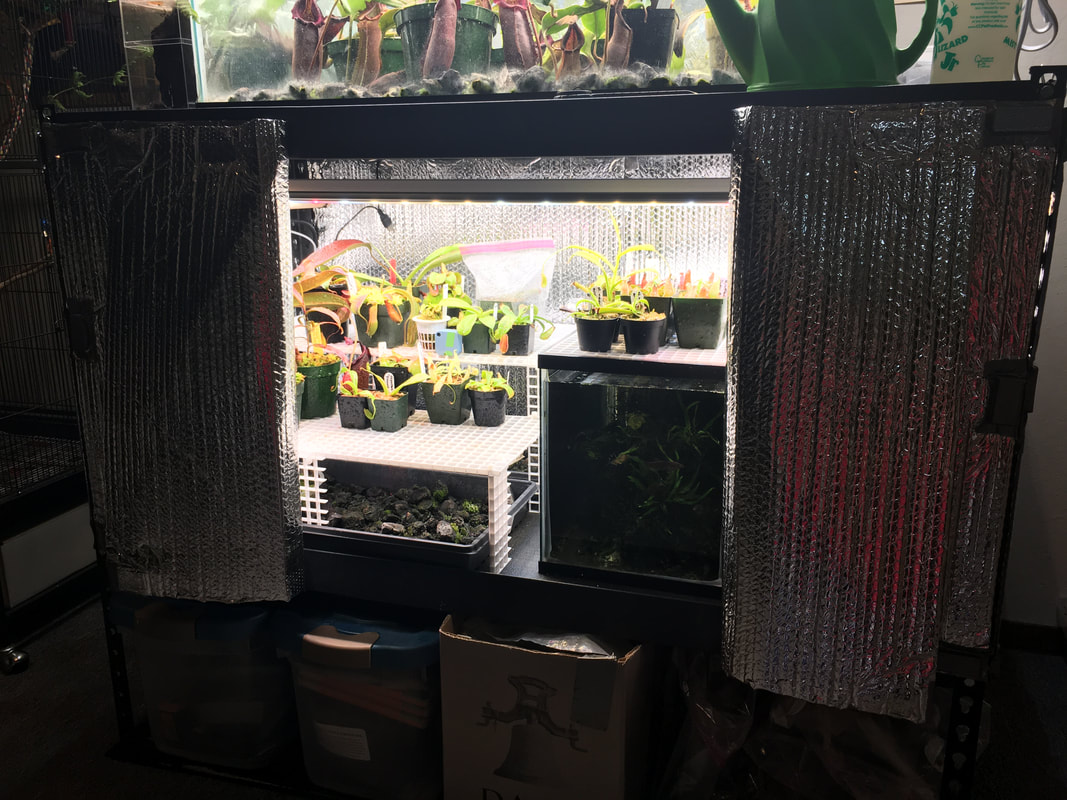 MAGNETS ARE AWESOME Shelving I used egg crate light diffuser and zip ties to build my shelves. The light diffuser was pretty easy to cut using mini wire-cutters - just be careful to point it away from your eyes because small bits of plastic pop off at surprising speed! I plan to lower the shelf by cutting off the ends of the legs as my plants get larger. The maxima x jacquelineae is almost ready to move out to my 40 gallon terrarium, but the other plants have another 6 months to a year at this height, at which point I will upgrade to a grow tent. 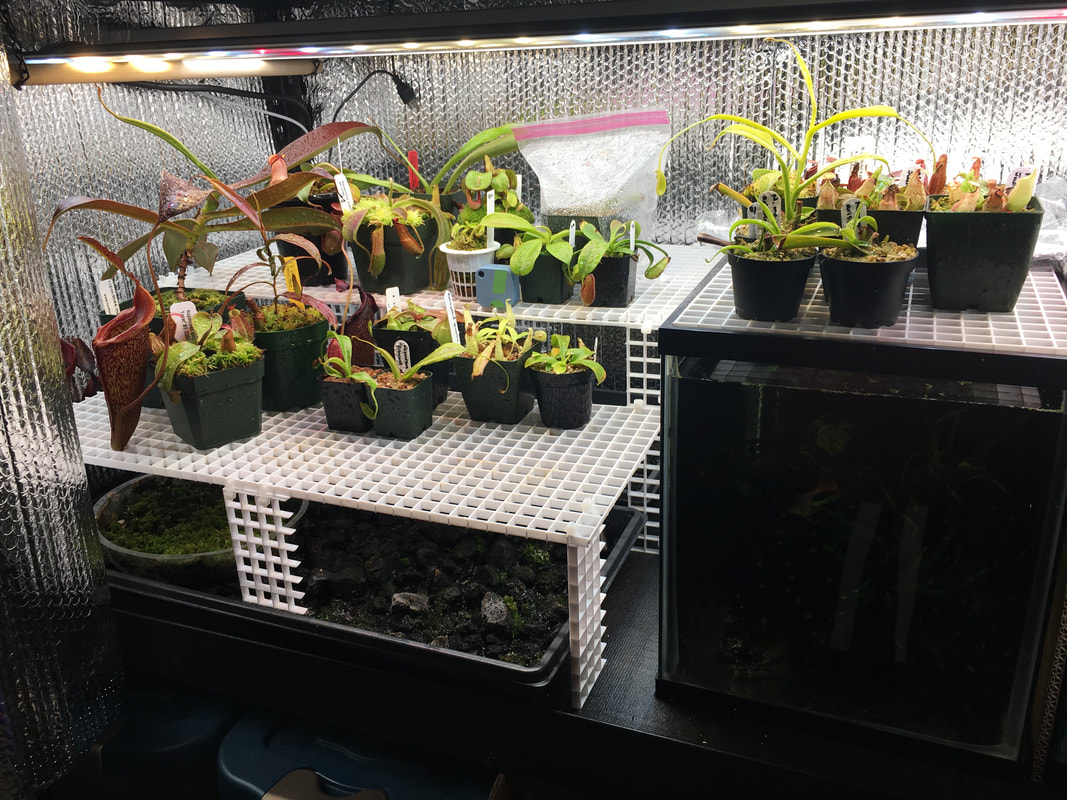 My tiny plant paradise! Humidity I just have regular seedling propagation trays underneath the shelves to catch draining water. They are filled with black volcanic rock (easily found in the landscaping section of any garden store), which increases the surface area for the water to evaporate from and thus boosts humidity. I also have several trays (repurposed food takeout containers) of live sphagnum moss growing underneath the shelves, where it is absolutely thriving! Fan I have a small computer fan in the back that circulates the air inside the growing area. So far it doesn't appear to have any issues with high humidity and I greatly appreciate that it is almost silent. I have the fan set to low at all times and it is angled to promote a circular path of air movement. Some particularly nectar-rich pitchers still get some black mold despite the air movement, but it is harmless and easy to wipe off with a wet paper towel for close-ups :) Since I increased the air circulation, I definitely noticed a decrease in mold and a big increase in growth rate! Average Growing Conditions - Warm Intermediate Light: 6700 - 13000 Lux (~170 PPFD) Humidity: ~90% night and 67% day Temperature: ~68F night and 85F day (still have some seasonal variation) 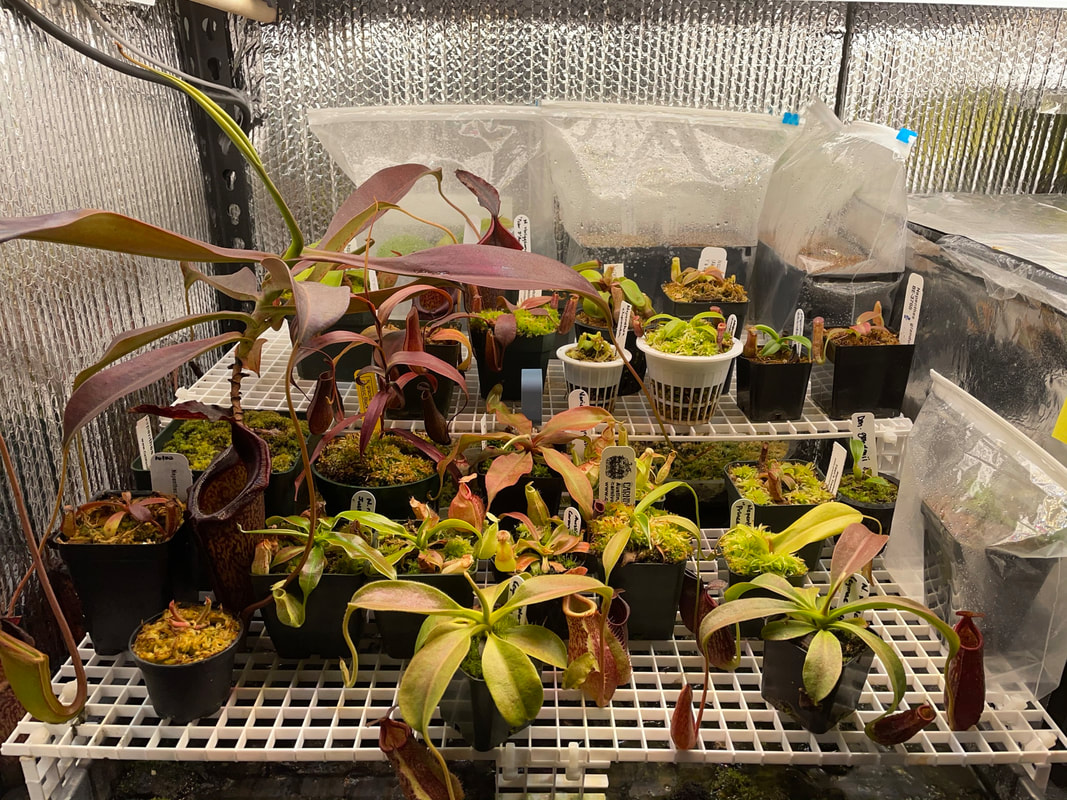 My plants are LOVING it in here! And that's it! It took about 4 hours for me to build from start to finish and I am really happy with the results! I am also looking forward to upgrading to a grow tent eventually...
I have been uploading more Nepenthes-related content on my YouTube Inglorious Bettas. I generally upload one or two videos a week. Subscribe and comment if you want to see more Nepenthes videos! I also post daily updates to my Instagram, @Nepenthes_Diary! Happy growing! |
AuthorJust a High School Biology teacher that loves growing plants! Archives
December 2020
Categories
All
|
 RSS Feed