|
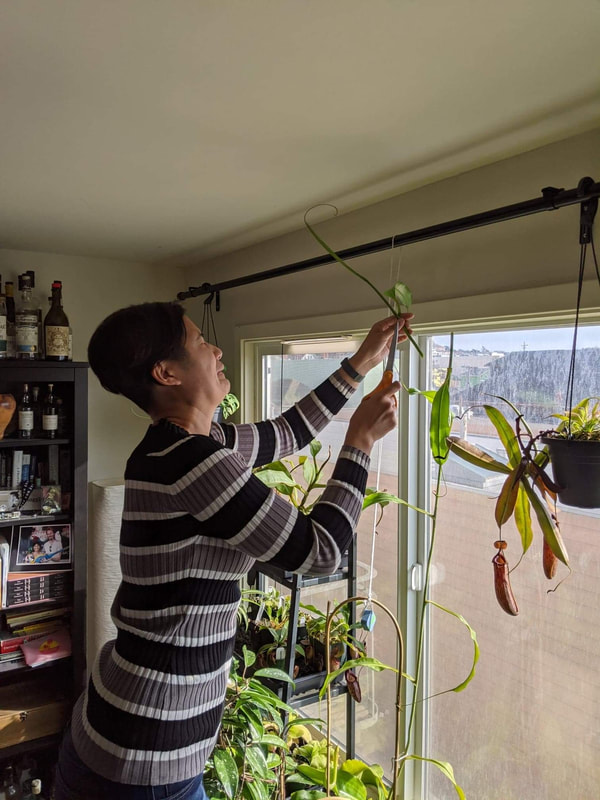
I thought it would be interesting to share how I built my "greenhouse shelf terrarium". I already had this metal 4 foot x 2 foot heavy duty set of shelves (unfortunately my particular model is discontinued) for my various fish tanks. Over time my fish population decreased while my plants exploded in number and size! I needed more growing space and utilizing the lower shelf was the ideal way to do so. 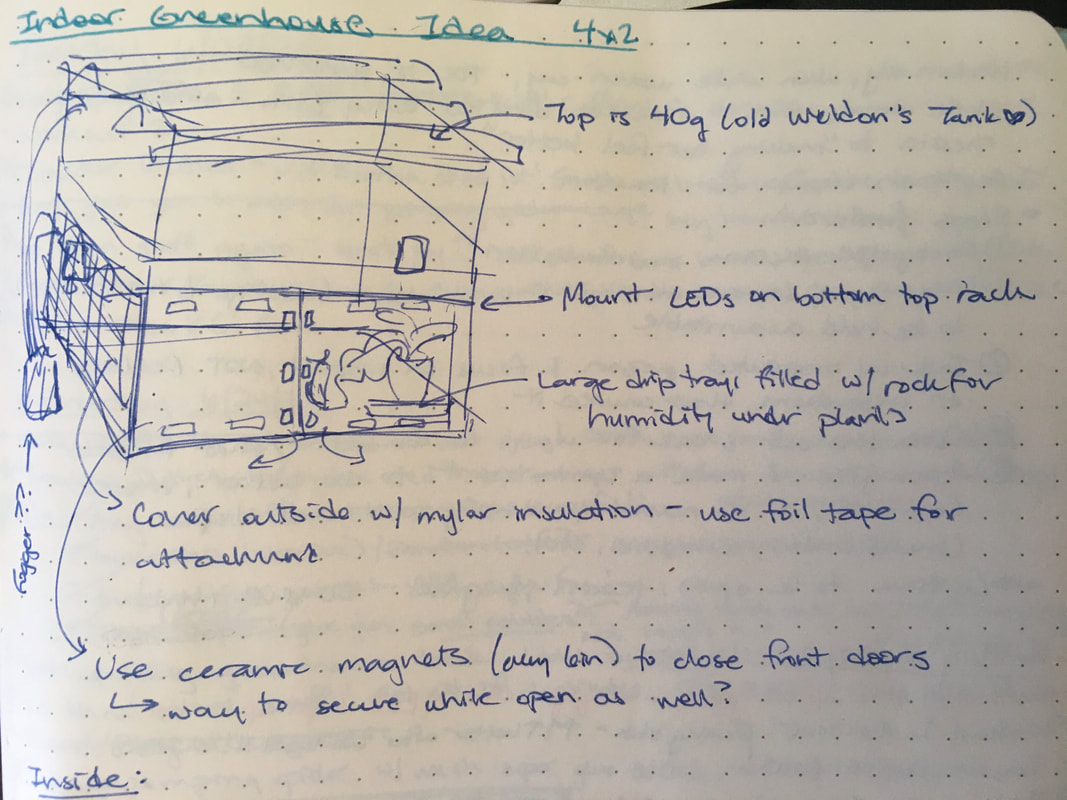 Every good build starts with some preliminary research and a brainstorming session :) I knew I wanted to enclose the lower shelf with reflective insulation to bounce back the light and contain the heat. I also wanted everything to be adjustable. Here are the details on each part of the build: Light Luckily my shelves are 4 feet long, which is the length of most shop lights. I got some 4000K LED shop lights SUPER CHEAP from Costco (buy one get one free sale!) and my plants grew well under them, but I recently upgraded to Carnivero's Florawave SV40 lights (test unit discount!). Now I have one 4000K LED shop light and one Florawave SV40 light over each growing space and I am extremely happy with the results! (See the difference in my review video below). PPFD averages 170 but I can use the multiple levels to adjust individual lighting needs. The light fixtures are resting on simple hangers I made from extra wooden dowels and leftover pieces of chain from other projects. The chain is looped on the upper shelf's wire rack and I can raise and lower the lights by adjusting the length of the chain and easily reposition the lights by sliding them around on the dowels. Reflective Siding The shiny material enclosing the shelf is Reflectix insulation, which is basically Mylar-covered bubble wrap. It is lightweight, flexible, and durable. I used duct tape to secure ceramic magnets to the edges and just slap it on the metal frame of the shelf. I love how I can super easily reposition them when looking at my plants! I can take them on and off in seconds or even partially open the flaps to peer in at my plants without losing too much heat or humidity, as seen below. 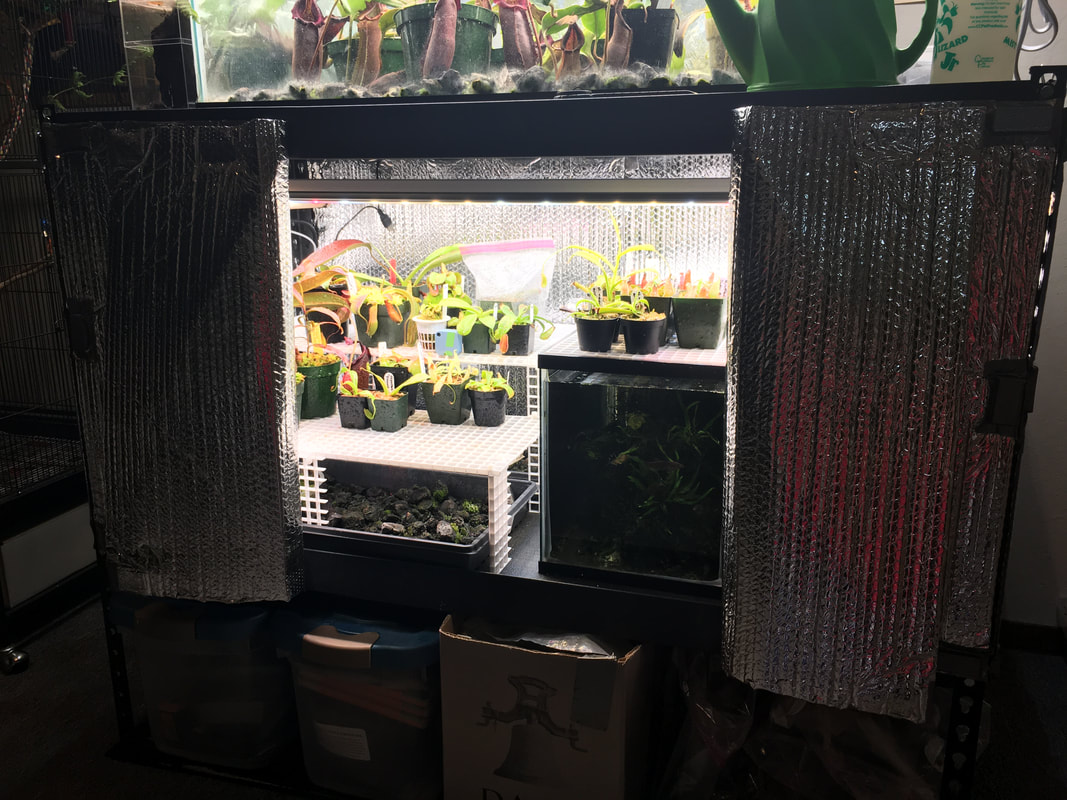 MAGNETS ARE AWESOME Shelving I used egg crate light diffuser and zip ties to build my shelves. The light diffuser was pretty easy to cut using mini wire-cutters - just be careful to point it away from your eyes because small bits of plastic pop off at surprising speed! I plan to lower the shelf by cutting off the ends of the legs as my plants get larger. The maxima x jacquelineae is almost ready to move out to my 40 gallon terrarium, but the other plants have another 6 months to a year at this height, at which point I will upgrade to a grow tent. 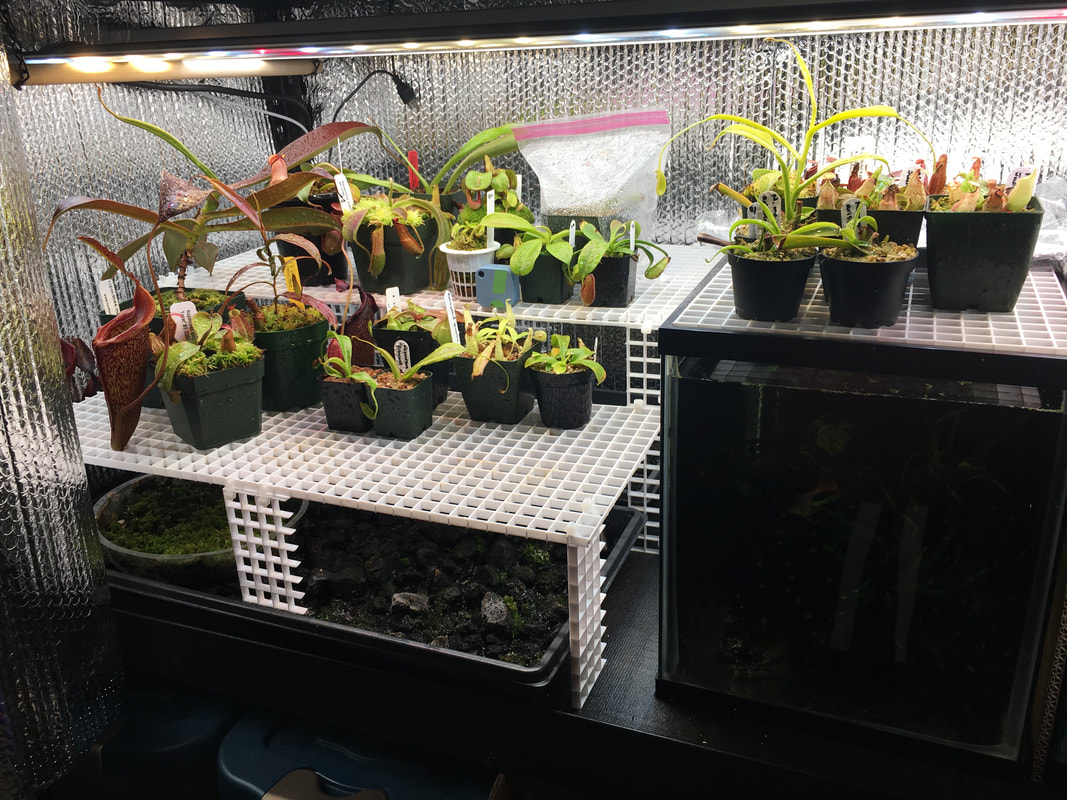 My tiny plant paradise! Humidity I just have regular seedling propagation trays underneath the shelves to catch draining water. They are filled with black volcanic rock (easily found in the landscaping section of any garden store), which increases the surface area for the water to evaporate from and thus boosts humidity. I also have several trays (repurposed food takeout containers) of live sphagnum moss growing underneath the shelves, where it is absolutely thriving! Fan I have a small computer fan in the back that circulates the air inside the growing area. So far it doesn't appear to have any issues with high humidity and I greatly appreciate that it is almost silent. I have the fan set to low at all times and it is angled to promote a circular path of air movement. Some particularly nectar-rich pitchers still get some black mold despite the air movement, but it is harmless and easy to wipe off with a wet paper towel for close-ups :) Since I increased the air circulation, I definitely noticed a decrease in mold and a big increase in growth rate! Average Growing Conditions - Warm Intermediate Light: 6700 - 13000 Lux (~170 PPFD) Humidity: ~90% night and 67% day Temperature: ~68F night and 85F day (still have some seasonal variation) 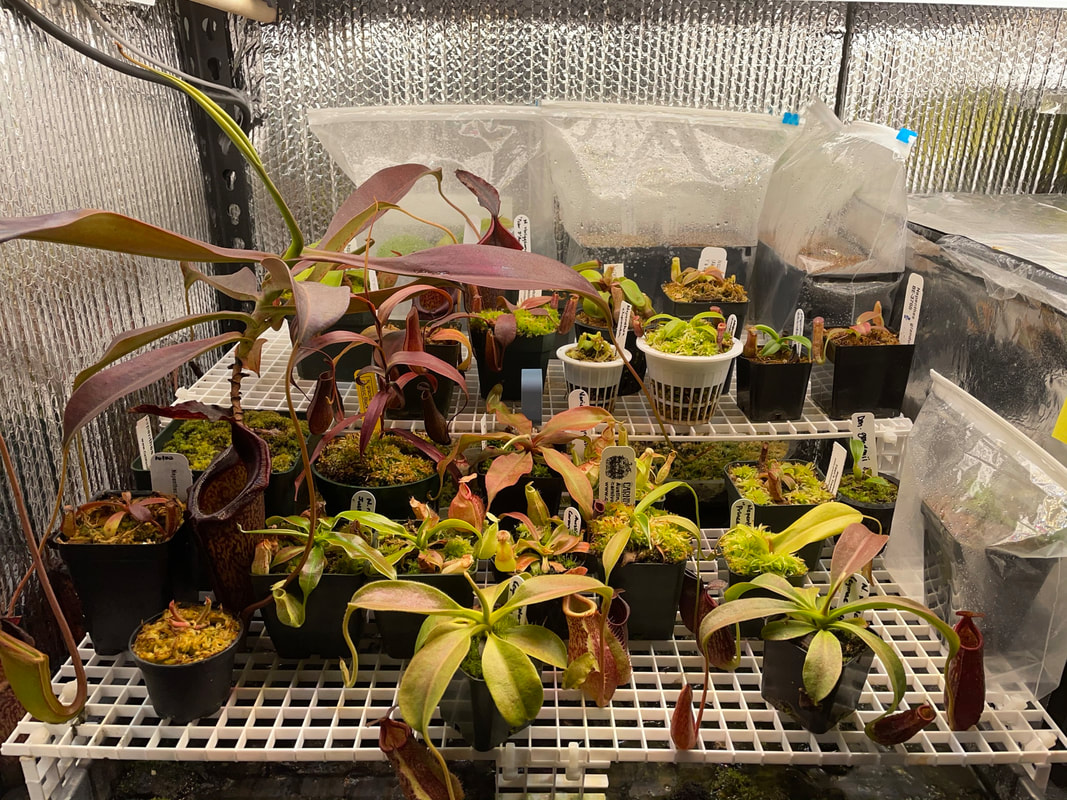 My plants are LOVING it in here! And that's it! It took about 4 hours for me to build from start to finish and I am really happy with the results! I am also looking forward to upgrading to a grow tent eventually...
I have been uploading more Nepenthes-related content on my YouTube Inglorious Bettas. I generally upload one or two videos a week. Subscribe and comment if you want to see more Nepenthes videos! I also post daily updates to my Instagram, @Nepenthes_Diary! Happy growing!
0 Comments
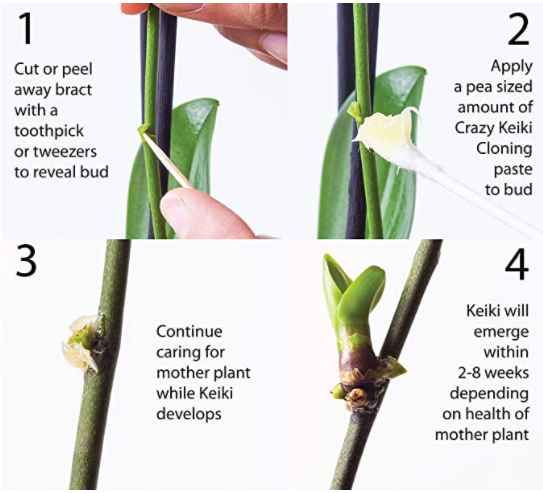
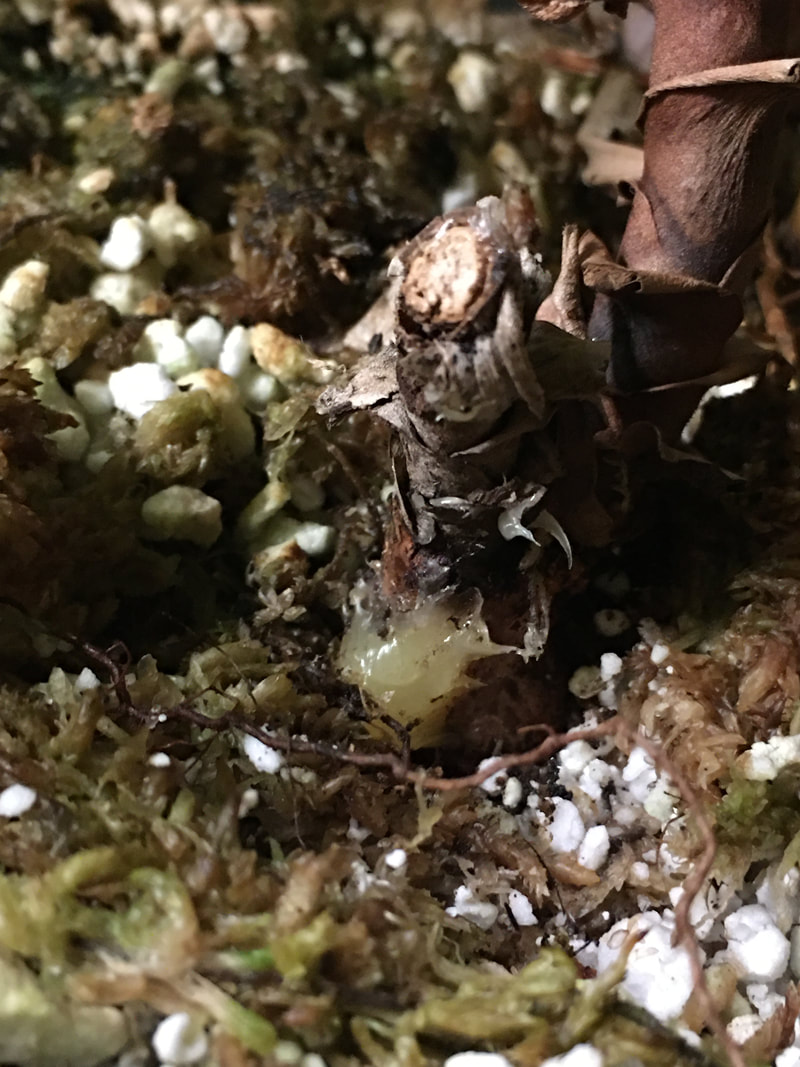
I've been really curious about using orchid keiki paste to activate dormant nodes on Nepenthes. The paste is mainly used on orchids to create a "keiki", or baby orchid, on a dormant node on a spent flower stalk. I've read about other Nepenthes growers using it to stimulate basal shoots on Nepenthes, the most well documented instance on an old FlyTrapCare forum post. Another old forum post shows great efficacy on Heliamphora tatei. After searching FaceBook for keiki paste on Nepenthes, I found several individuals that reported success when gently cutting away the woody stem and coating the exposed green tissue with keiki paste. Emboldened, I decided to try it out myself! My procedure of all of the following experiments was basically the same - sterilize a sharp razor blade with rubbing alcohol and dry with clean paper towel, then carefully shave off the woody exterior off the stem until some green tissue was exposed. Then I carefully applied a pea-sized ball of keiki paste using a Q-tip, being very careful not to get any on my skin. In general I tried to cut above where I thought a dormant node might be (juncture of leaf joint). All plants were initially treated on November 14 2020 and were observed closely for 2 years - October 2022! Experiment 1: Failed stem cutting 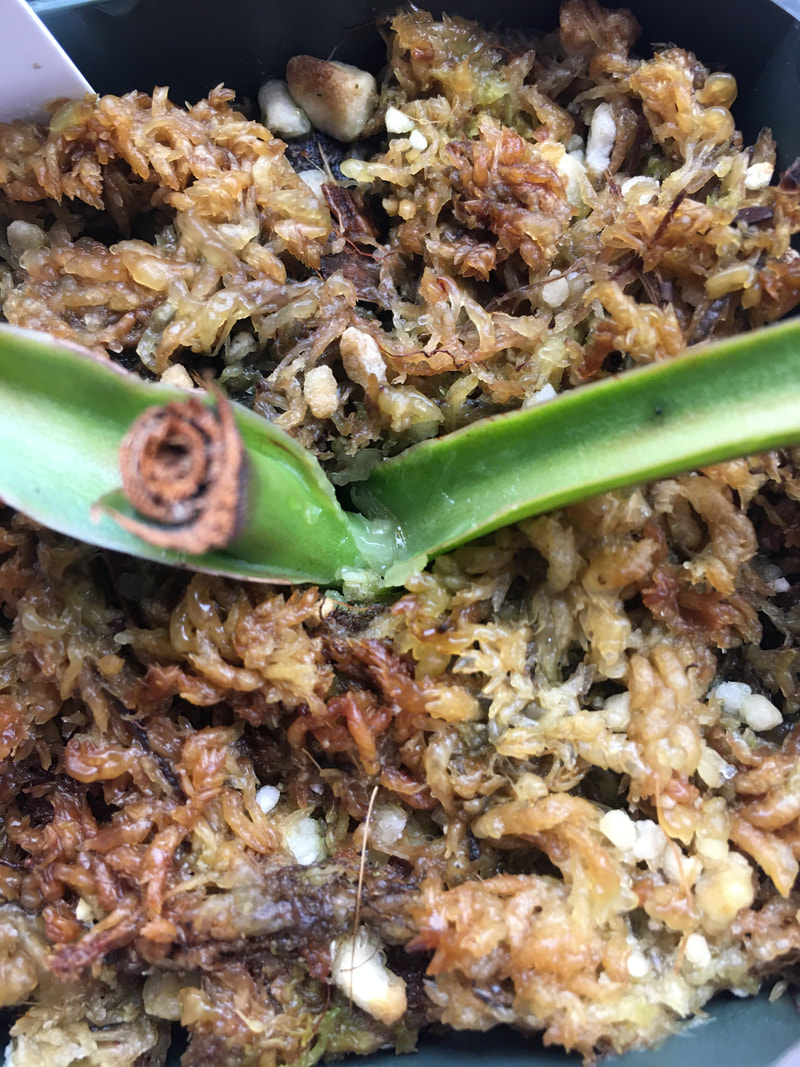 Peter D'Amato stem cutting that has been sitting inactive for months This stem cutting hasn't done anything for months! I believe it has rooted since it resists a gentle tug, but there has been no activation in either node. I think it would be really awesome if I could use keiki paste to reliably activate the lowest node on stem cuttings! I added a small ball of paste to the lowest node and crossed my fingers! 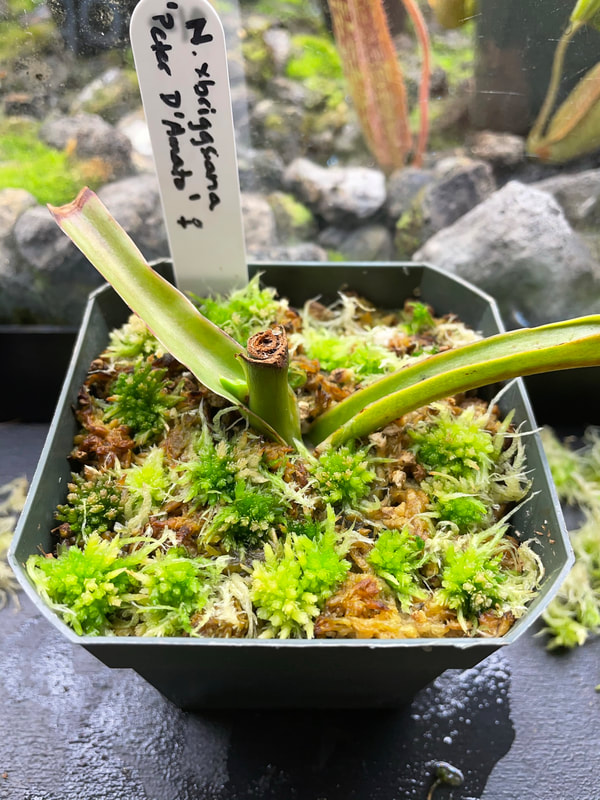 Two months later and the top node activated! The lower node with the keiki paste remains unchanged. RESULTS - Many months later, the lower node never activated - upper node was the only successful growth from this cutting. Experiment 2: Nepenthes maxima x jacquelineae
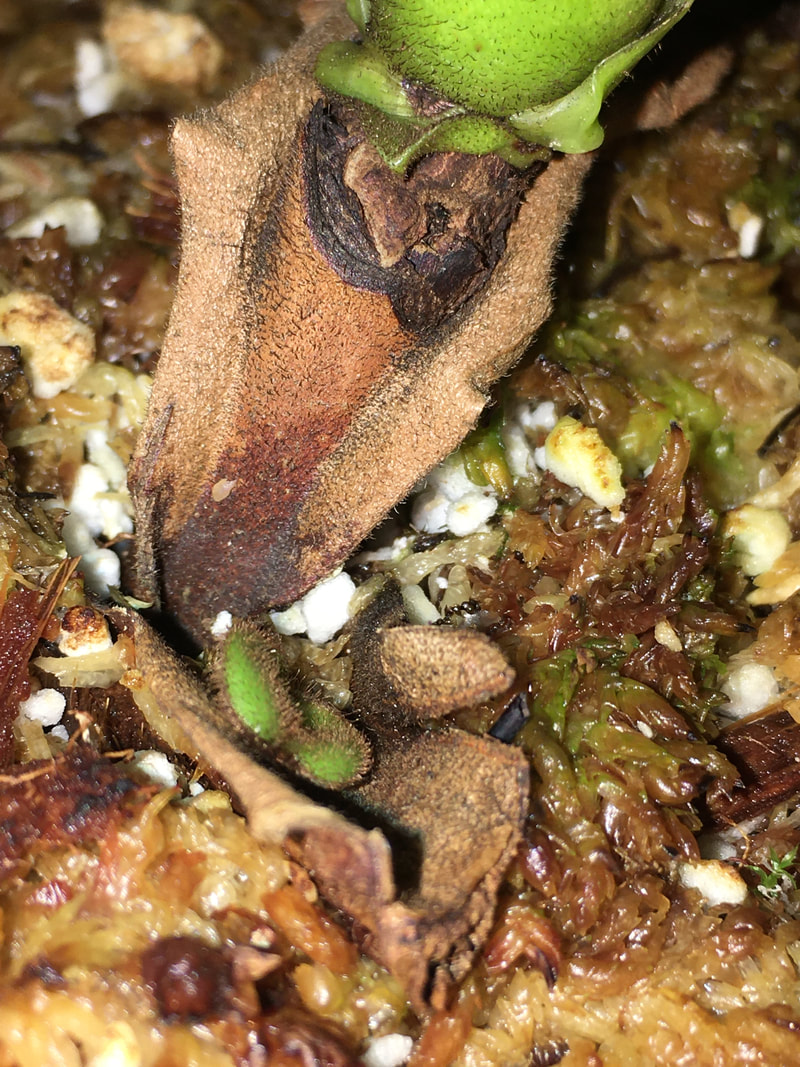
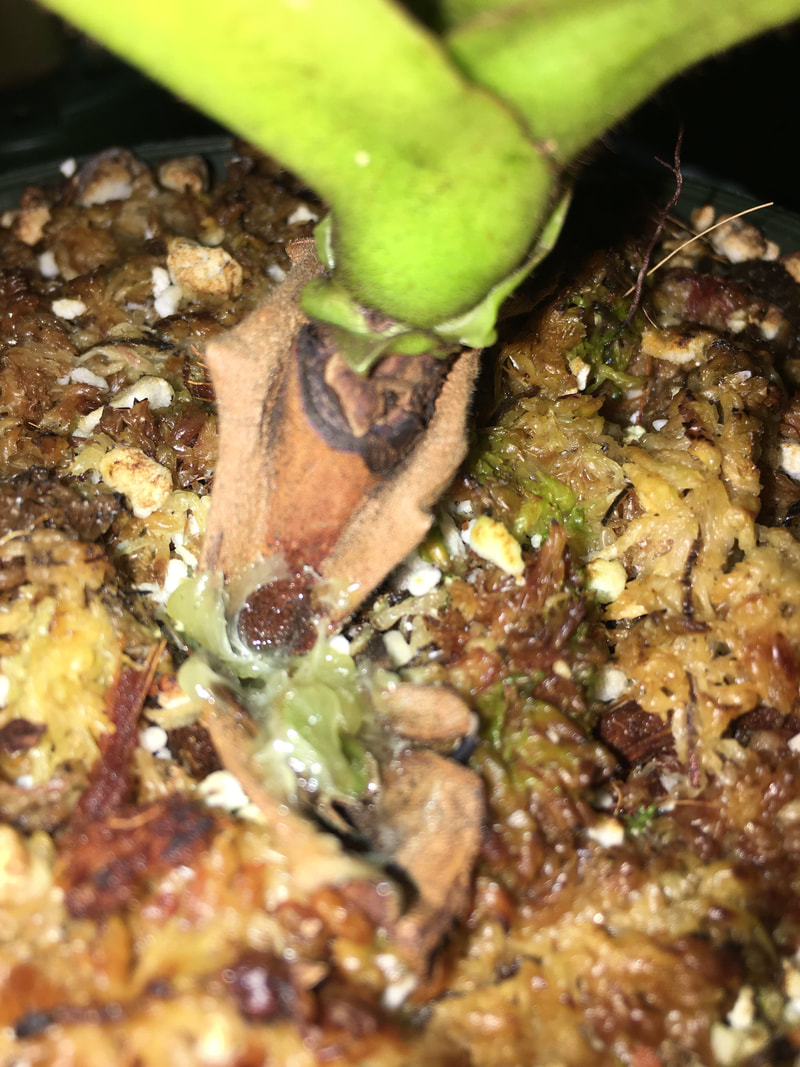
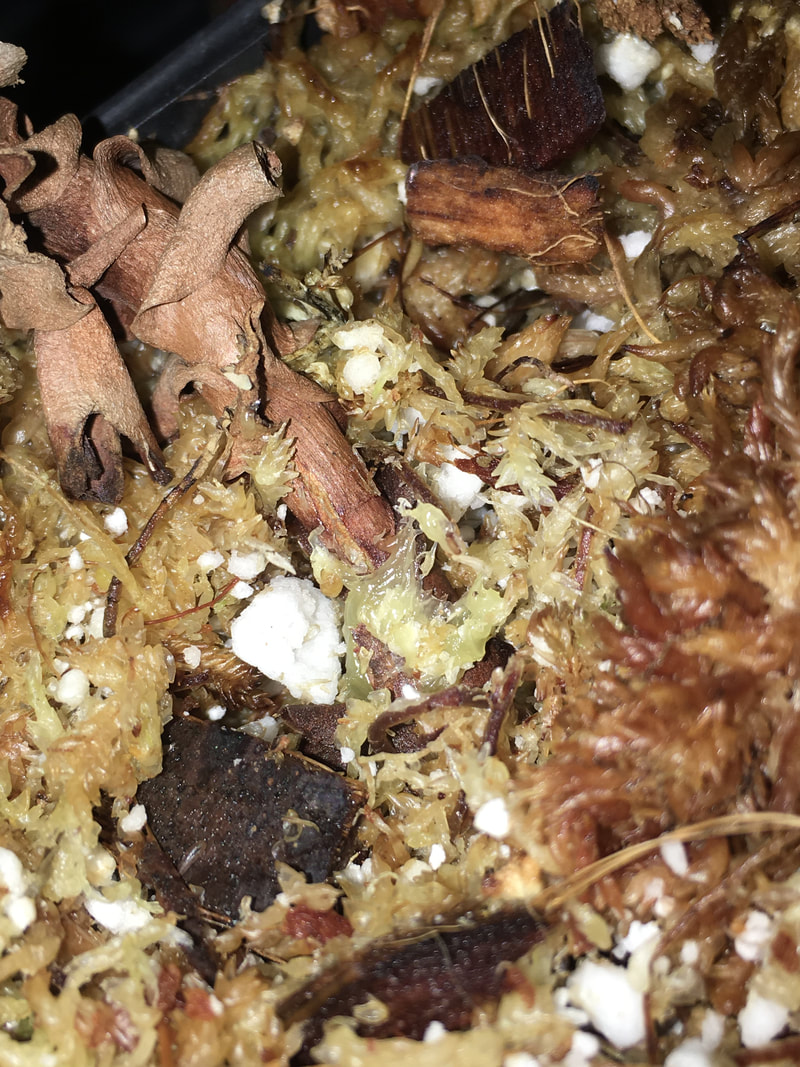
I struggled with my Nepenthes maxima x jacquelineae for over a year on the windowsill before finally moving it to my terrarium, where it exploded in growth! It struggled for such a long time that it has this ugly bare stem coiled on the surface of the media. It would be really nice to have a basal down there! It is also in danger of quickly outgrowing my terrarium at the rate it is going. Hopefully some of that vigor will be transferred to a basal shoot! RESULTS: This plant did produce additional basals, but none of them were located at the original cut site. Whether or not this was directly related to the addition of keiki paste or not is difficult to determine. Experiment 3: Nepenthes robcantleyi
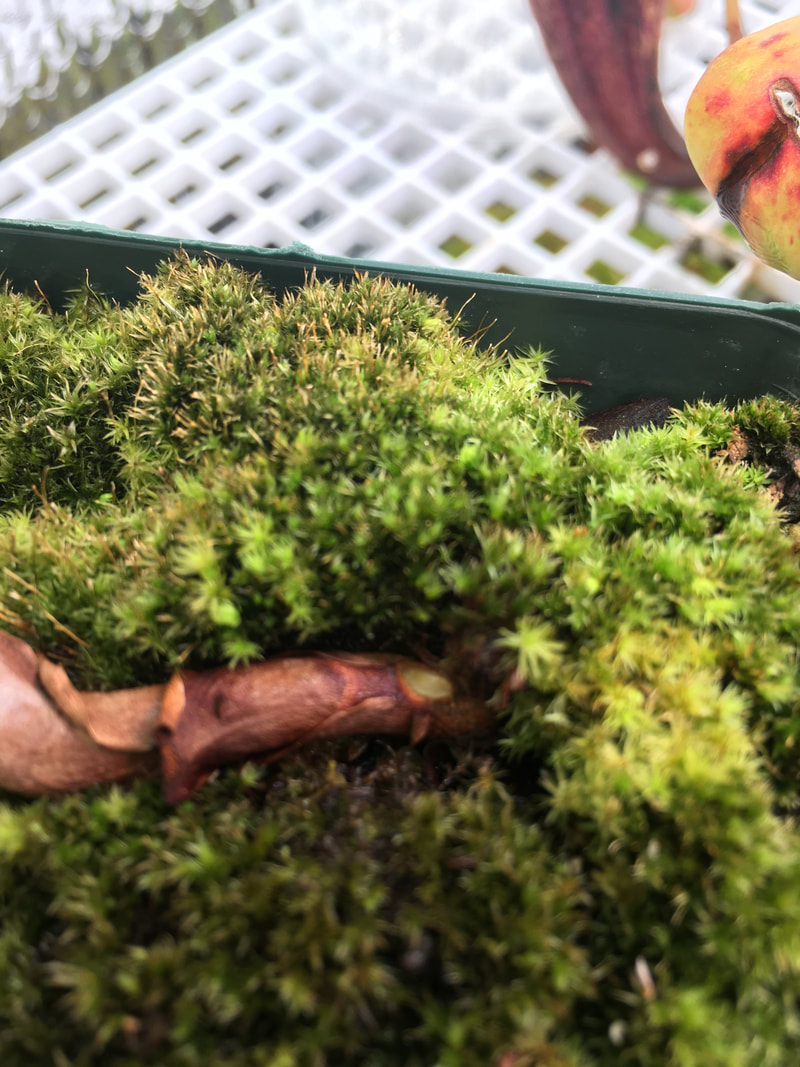
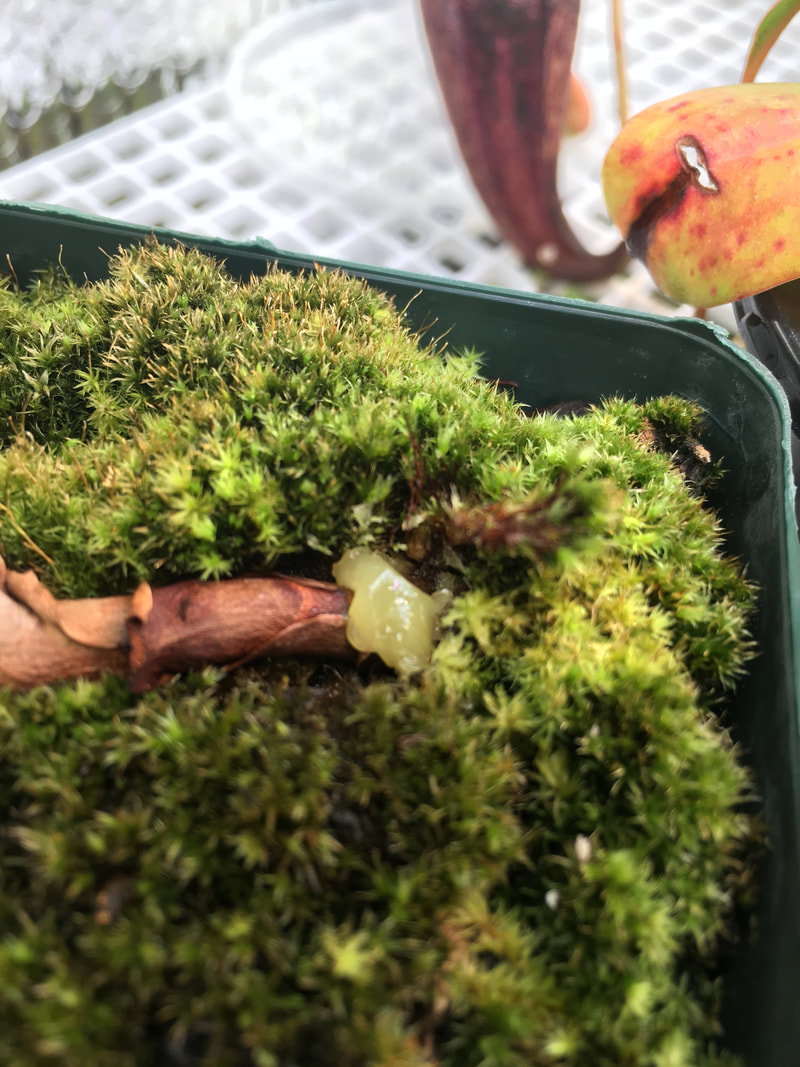
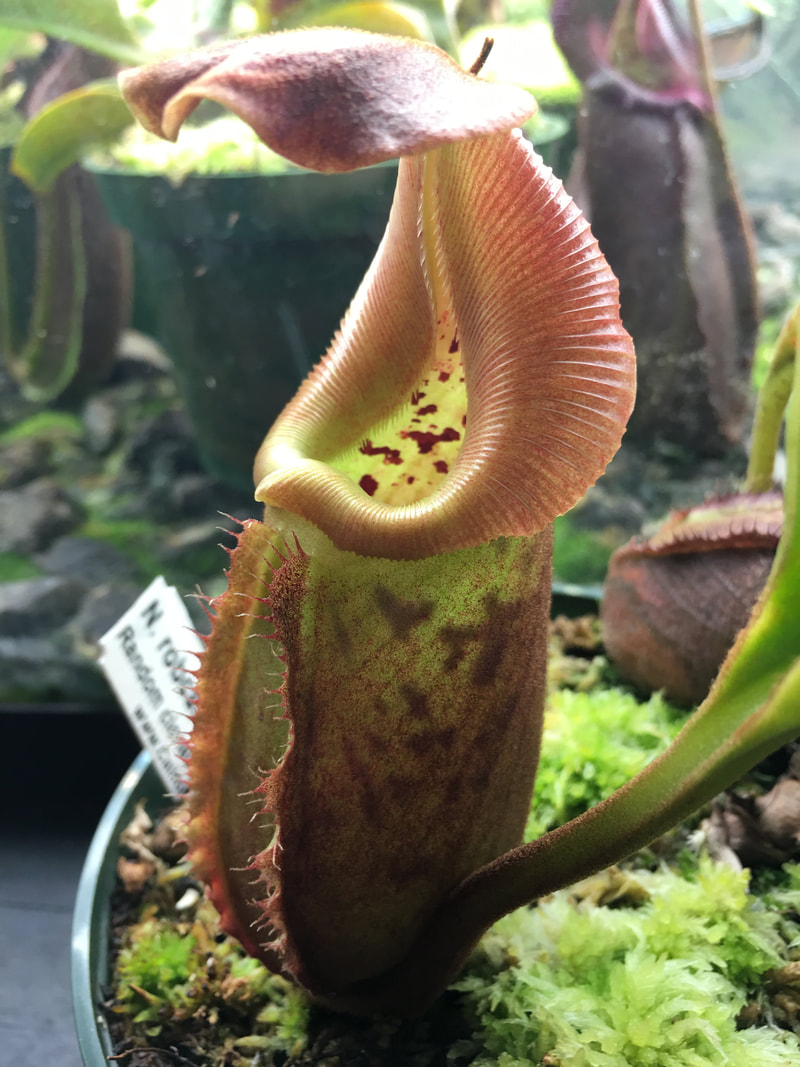
My robcantleyi is basically leaning out of control to one side! I'm hoping a basal shoot will balance it back out. I also struggled with this plant for a while before I could figure it out, so there is a lot of ugly bare stem. RESULTS - My robcantleyi continues to lean out of its pot at a crazy angle, with no basal production. I eventually suspended this pot so it could grow at an angle. The stem has since completely healed since the application of the keiki paste. Experiment 4: Nepenthes maxima
I just recently removed the top half of the climbing stem on my Nepenthes maxima. The apical growth point was starting etiolate from lack of light up near the ceiling, so I made the difficult decision to cut it off (even though I do hope that it flowers again soon!) The applies keiki paste to the main stem in hopes of a new basal to replace the recently cut climbing stem. This particular plant also has a mature second growing point, but I really love the look of multiple growing points on the same plant (double the pitchers!) as long as the plant is vigorous enough to support multiple growth points. This climbing stem basically grew 6 feet in a couple of months, so I don't think this plant is lacking for anything hahaha. RESULTS - Nepenthes maxima has since produced many basals, but none of them at the original cut site. Whether or not basal production was encouraged by keiki paste or just a result of vigorous growth is impossible to determine. Experiment 5: Nepenthes x Dyeriana - lowers or uppers?
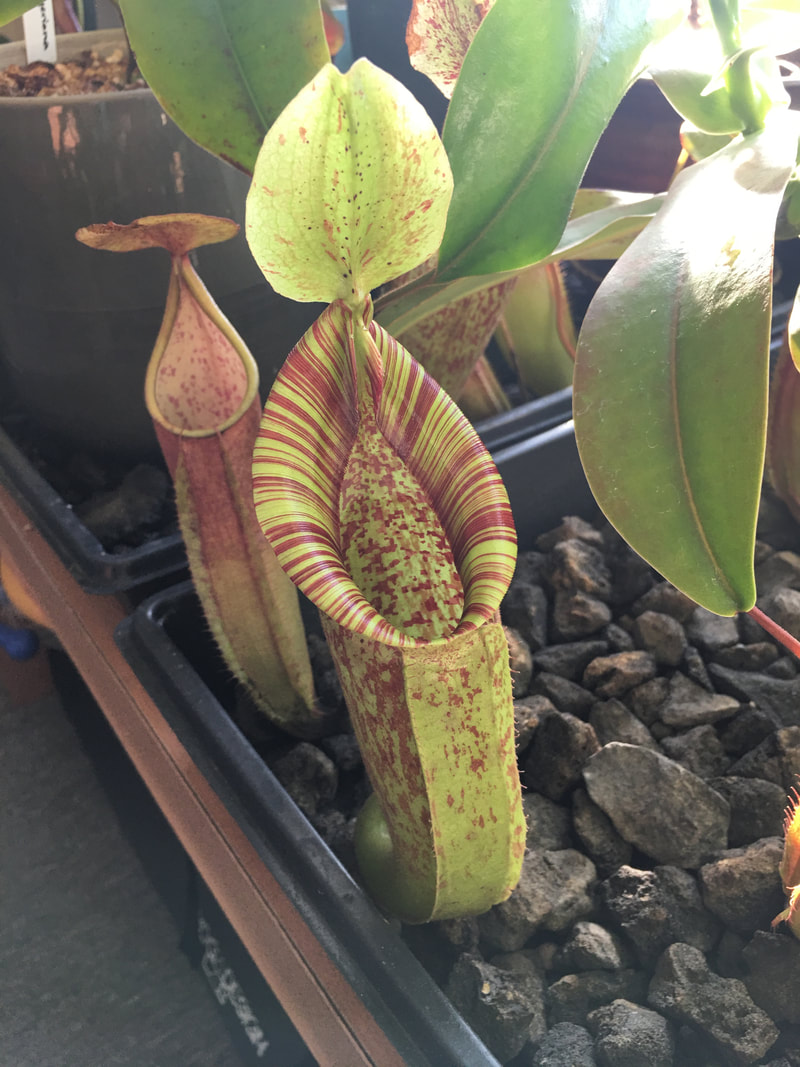
This one I am very curious about! Almost all of the pictures I have seen of N. x Dyeriana pitchers have been of the iconic uppers - very large in size, reduced wings, and tendril exiting out the back. Just recently I saw some pictures of N. x Dyeriana lowers! They have much larger wings and the tendril exits to the side. I am very curious to see if this basal ends up with lowers or uppers because I deliberately chose a node at ground level. We will see! RESULTS - Dyeriana did NOT activate a lower node until MUCH later (over two years after application of the keiki paste) and is likely a result of topping the main growth point and not because of the applied hormones. The original cut site was completely healed over after application and before basal production. However, the lower basal does appear to be producing lower pitchers! Experiment 6: Stalled basal on Nepenthes x tiveyi "Red Queen"
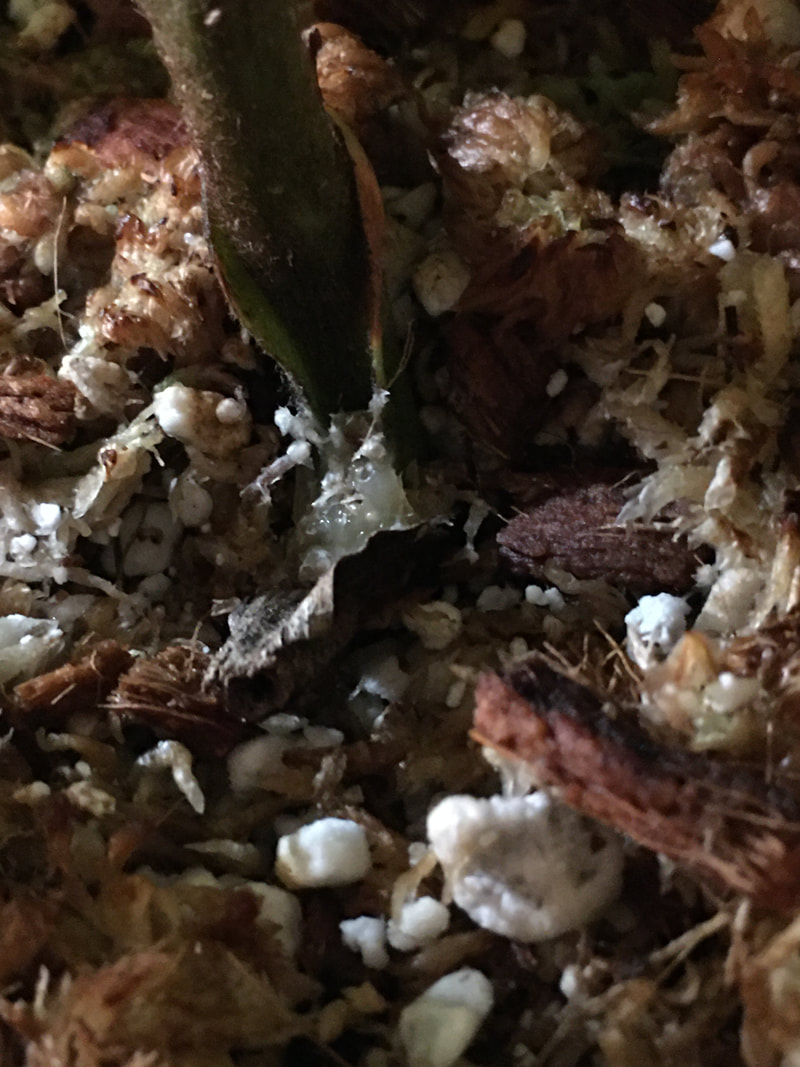
Now this is an interesting one! I received my Nepenthes x tiveyi "Red Queen" as a rooted cutting back in June 2020. At the base of it was this tiny basal. I thought perhaps the tiny basal would start growing again once the plant acclimated... but no! It has remained exactly the same for nearly 5 months! I hope that the keiki paste jumpstarts the basal to grow again. I have no idea what will happen here! RESULTS - The stalled growth actually DIED after application of keiki paste! Whether death of the node was hastened by the keiki paste or it was already on its way out before the paste was applied is impossible to determine. Experiment 7: Nepenthes sanguinea "Orange"
This sanguinea is growing very vigorously, but it also has a case of the leans! It would be really nice to have a second growing point on the opposite side to balance it out. This sanguinea also holds on to its pitchers for a very long time - it would be great to have double the pitchers on this plant! RESULTS - The original cut site was completely healed over by the time this plant produced a basal, which was likely the result of cutting the main growth point rather than a direct consequence of keiki paste application. CONCLUSIONS WELL... at least the results here are succinct. NONE of these experiments resulted in an activated node. Although many plants did eventually produce basals, all original cut sites were completely healed over by the time the basals grew and were likely the result of removing the main growth point and/or vigorous growth instead of the keiki paste. I did not observe any negative implications from the keiki paste, but I also did not observe any benefits. I did not have a handy Phaelonopsis orchid bloom stalk to use a my positive control, so it is possible the keiki paste itself was inactive. At least for my growing practices, keiki paste has not beneficial or negative consequences, so I will not be using it again. If you would like to see how the plants are doing, I have been posting updates to my Instagram, @Nepenthes_Diary every couple of days or so! Happy growing!
Rapidly acclimating new Nepenthes to your growing conditions is one of the most crucial steps to obtaining long-term success of your expensive acquisitions! I learned the hard way that taking just a few extra precautions during the initial unboxing and acclimating process can greatly reduce shipping stress and allow my new Nepenthes to start growing vigorously right away. 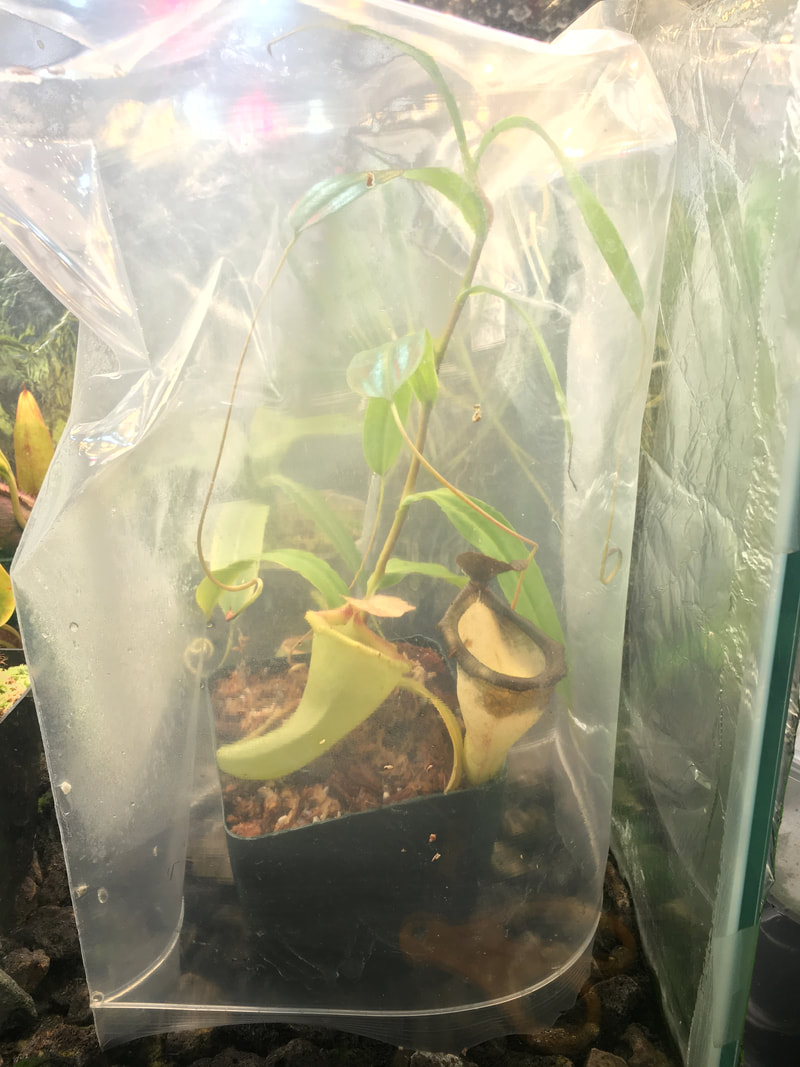 Proper acclimation will prevent unnecessary pitcher loss and mitigate shock from shipping damage. This rooted cutting will lose one pitcher due to shipping damage, but the other one looks great! If you can't completely seal the bag due to the size of the plant, inverting the bag like a dome works almost as well. I used to just throw my Nepenthes into my growing conditions and accepted slowed growth (lasting 2-3 months!) and loss of pitchers as normal. After discussing the frustrating slowness of acclimation with fellow Nepenthes grower Joshua Ritts, he taught me that bagging the plants and providing 100% humidity for 1-2 weeks can go a long way towards preventing shipping shock. I have tried this on many new acquisitions and kept a log of careful observations, and it actually works!  Poor Nepenthes gracilis showing the ring of small, stressed leaves produced during poor acclimation! New growth looks great, but shocked leaves will take a while to go away! Rapid Bag Acclimation Procedure After unboxing and inspecting the plant for shipping damage and pests, pot the plant up and water the media well. Fill the pitchers with water and completely seal the plants in ZipLock bags for 1-2 weeks. After I start to observe growth in the new plant, I slowly start to adjust the plant to my regular growing conditions by opening the bag up more and more every day - maybe only open halfway the first day, then opened completely but still in the bag for several days, and finally removing the bag after about a week. Bam! The new Nepenthes may still lose a pitcher or two from shipping damage, but most will hold on to their existing pitchers and start developing new ones right away 2-3 weeks of gentle acclimation. Most new plants treated this way start leaf jumping right away! I'm so happy to have found this technique and will be using it on every new tropical pitcher plant that I acquire! I hope this new technique helps you! I have also been uploading more Nepenthes-related content on my YouTube Inglorious Bettas. I generally upload one or two videos a week. Subscribe and comment if you want to see more Nepenthes videos! I also post daily updates to my Instagram, @Nepenthes_Diary! Happy growing!
|
AuthorJust a High School Biology teacher that loves growing plants! Archives
December 2020
Categories
All
|

 RSS Feed